Showing posts with label things to eat. Show all posts

February 11, 2014

Valentine's Day Trail Mix

Valentine's Day snack


Alice's class will have a Valentine's Day party at the end of this week.

She can hardly wait.

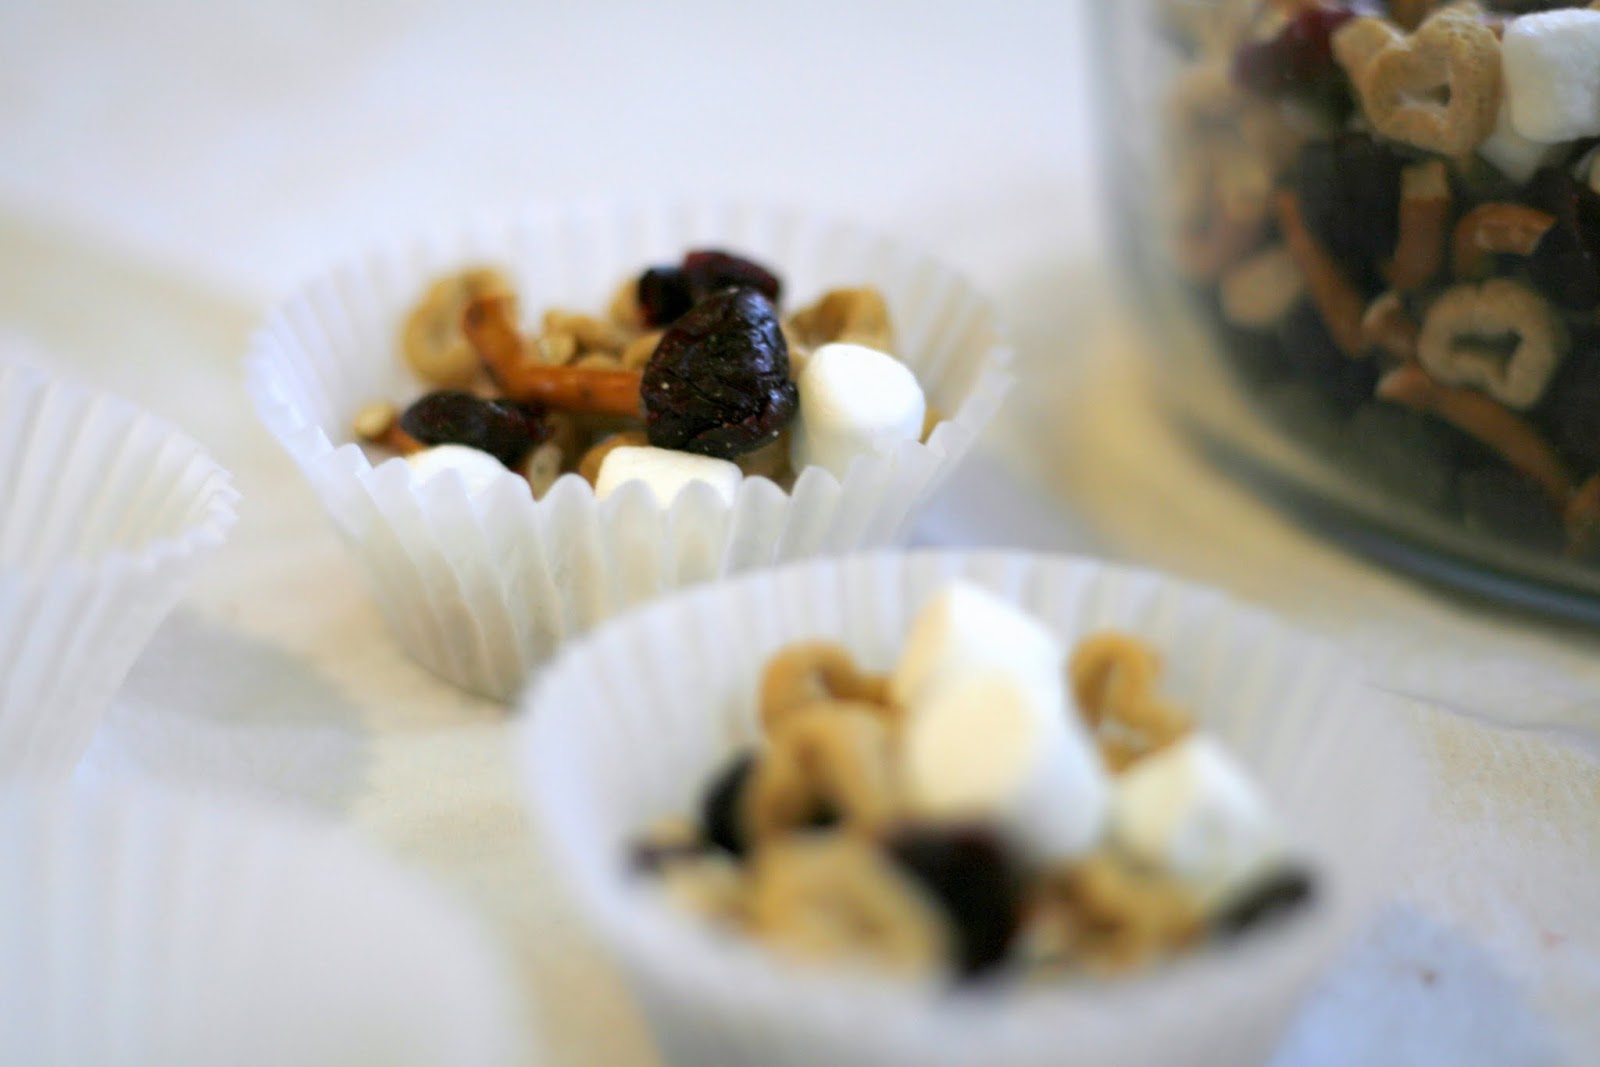
In the meantime, since both of us were feeling festive, we decided to throw together a fun little Valentine's Day snack - she's enjoyed munching on it after school.

It's super easy and a great measuring activity for preschoolers or even toddlers.

Valentine's Day Snack

Make as big or small a batch as you'd like using:

  • Two parts Quaker Whole Hearts cereal. (I chose it for the shape, but if you can't find it, any kind of 'Os' cereal would work).

and one part each

  • Chocolate chips
  • Mini marshmallows
  • Dried cranberries
  • Something salty - we broke apart some pretzels, but I bet popcorn would be tasty too

For a little more color and zip, you could also toss in a handful of cinnamon heart candies

(For our smallish batch, we used 1 cup of cereal and half a cup of everything else).

Valentine's Day snack

Pour everything into a bowl and mix.

Alice and I served ours in paper cupcake liners, but I think this treat would be extra special inside some simple paper favor bags.
Valentine's Day snack


Find more Valentine's Day DIY ideas here.

July 3, 2013

Easiest Strawberry Shortcake

strawberry shortcake

When it comes to strawberry shortcake, I strongly prefer a biscuit-y foundation to angel's food. What do you think?

This recipe is super-simple (It comes from the back of the Bisquick box), and would make the perfect dessert for your Fourth of July barbecue. And while no one could blame you for wanting to keep the oven turned off for the next few days, I promise this is worth it.

For the topping, you need:
  • 4 cups of strawberries, quartered
  • 1/2 cup of sugar
  • Whipped cream

For the cake, you need:
  • 2 1/3 cups Bisquick or similar baking mix
  • 2/3 cup milk
  • 3 tablespoons sugar
  • 3 tablespoons butter or margarine, melted

First, mix the fruit with half a cup of sugar and refrigerate until serving.

For the shortcake, mix all ingredients, then spoon six mounds of dough onto an ungreased cookie sheet.

Bake at 425 degrees for 10-12 minutes

Split the cakes, then top with fruit and whipped cream.

Easy, right? And so good.

strawberry shortcake

June 24, 2013

Growing Blackberries at Home

blackberries

Only a few blackberries are left on our vine anymore. Purple and overripe, they make the porch smell like jam.

We planted them with crossed fingers, not really knowing what to expect. But it turns out blackberries are terribly easy to grow at home. (They grow wild around here too - we recently found a patch over at Pixie Woods).

Watching Alice pluck berries right off the vine and pop them in her mouth has become one of the great pleasures of early summer for me.

blackberry vine

Here are a few things to keep in mind when growing blackberries at home:
  • You probably want to trellis them. Not all blackberries need the extra support, but it's helpful, especially when it's time to harvest. Ours grow along the front porch railing, which is convenient and pretty.
  • Blackberry canes grow one season and then produce fruit the next season. For us, this means we get a year of really abundant berries, followed by a year that's sort of disappointing.
  • They love full sun and well-drained soil and, after the first year, need a lot of pruning.
  • Blackberries are usually planted in December or January, the dormant season. But you could plant a potted vine even now. Space them at least 3 to 4 feet apart. (In my experience, they really take off - you might not need too many).
  • Pick when the berries are dark, dark purple and yield easily. If the berry has even a little red still on it, it's unripe and likely bitter.
  • Be careful. Blackberries have pretty white blossoms that look delicate and sweet. But they can also have monster thorns - make sure little hands don't reach under or inside the vines to harvest.
blackberry pie


I don't know about you, but blackberry pie seems like the perfect summery dessert. I recently shared my recipe with The Record newspaper. Find it here.


We replaced part of our front yard with an edible garden. Read more about it right here.

June 19, 2013

Growing Artichokes at Home

growing artichokes

When we decided to plant a fruit and vegetable garden in the front yard, it was really important to me that the project look intentional and pretty - not like we were trying to farm the front lawn.

Artichokes seemed like a good pick for us. Their big, silvery leaves and architectural profile - they look a little prehistoric, to be honest - would add beauty and interest to our garden.

We also hoped they would produce artichokes.

So it was disappointing, that first season, when they didn't. I think I know what went wrong: 

Artichokes like cool, foggy summers and frost-free winters - that's why you see so many growing in the Central Coast. In favorable conditions, each stalk will produce one big bud (the part you harvest) and a couple of smaller ones. But when conditions are too hot and dry, the plant won't produce.

Ours needed more water.

We did better this year, growing about 10-12 artichokes between our two plants. We ate them simply - steamed and, once, with honey-mustard sauce.

I'd call it a success.

Here are a few more things to know if you want to try growing artichokes too:

  • Artichoke plants are big - about 3 to 4 feet high and 6 feet in diameter. Give them lots of space.
  • It's a perennial; plants will produce edible buds for about five years.
  • In warm climates like ours, plant in partial shade and water once a week - or even more frequently - during the growing season.
  • Cut artichokes from the stem, an inch or so below the bulb.
  • Harvest when the buds are about 3 inches in diameter, but still closed tight.

Even if you wait too long, an artichoke flower is lovely consolation.

growing artichokes

Fun fact: The entire edible portion of an artichoke bulb is about 50 calories. Ha. After all the work it takes to prepare and eat one, you'd think they'd be more substantial.

We replaced part of our front lawn with an edible garden. To read more about it, go here.

February 14, 2013

Baker's Boutique


stockton cupcakes

Sweet Alice celebrated her big third birthday recently, and since we decided not to have a backyard party this year, we wanted to plan something special for her nursery school class.

Last year, on the recommendation of a very smart mama friend, we sent her to school with ladybug cookies from M&W Dutch American Bakery. Adorable.

But this year, she had a taste for something different, so we decided to try mini-cupcakes from Baker's Boutique in the Stone Creek Village shopping center. Alice had a tough time deciding between chocolate and vanilla, so we ordered a dozen of each, topped with buttercream then dipped in hot-pink sanding sugar.

We ordered on a Tuesday and picked up on a Thursday.

At which point we shared this terrible Veruca Salt moment: When the cashier opened the pastry box to show Alice her gorgeous treats, my daughter exclaimed, "I don't want cupcakes!"

Oh, man. Can I explain? Above the cash register at Baker's Boutique is a really beautiful Little Mermaid display cake, and Alice decided, then and there, that that's what she really wanted. Tell me you've been there.

stockton cupcakes

Nonetheless.

She came around quickly. The cupcakes were as delicious - moist and light - as they were pretty, and the kiddos seemed to really enjoy them.

(I should also admit to sampling a couple more cupcakes since then. My favorite is the chocolate BB - it's a chocolate cake, filled and topped with vanilla buttercream, then dipped in chocolate ganache. So tough to resist. Though I really should).

Go to the Baker's Boutique Facebook page for updates on daily flavor selections, and to find out where you might find their mobile cupcake truck.

stockton cupcakes

In the meantime, what do you think is the best cupcake in town? I feel like this is something I should get to the bottom of.

January 21, 2013

Recipe: Slow-Cooker Hot Chocolate

slow-cooker hot chocolate

Most of the time around here we use our slow cooker for very sensible things. In fact, there's a soup warming up in there this very minute.

But a couple of fridays ago, I felt like the three of us deserved a high-five for making it through a long week in one piece, so I pulled out the slow cooker, stirred together a few things I thought would make for good hot chocolate and crossed my fingers.

It's decadent for sure. But in the best way.

slow-cooker hot chocolate

You'll need:

2 cups half-and-half
4 cups milk
1/4 cup, plus 2 tablespoons unsweetened cocoa powder
1 can sweetened condensed milk (14 ounces)

Instructions: Whisk all the ingredients together in your slow cooker, then cover and heat on low for about 2-3 hours - until it's hot. (Be careful about letting it cook for very much longer, though, especially after you've served some of the hot chocolate - it'll scorch).

You could certainly do this over the stove, but then of course, you wouldn't be able to walk away from it. And what about stirring in some cinnamon or vanilla? Chili? Lots of options ...

slow-cooker hot chocolate


Do you have a favorite hot cocoa recipe? Or a favorite slow-cooker recipe, for that matter? I'd love to hear it. 


December 19, 2012

Homemade Caramels

homemade caramels

This recipe came to us from one of my husband's aunts. And not having any candy-making experience, I can tell you I found it a little daunting at first.

(In fact I completely botched the first batch - keep an eye on that temperature.)

But the ingredients are simple and inexpensive, and really, it's a fairly easy recipe after all - one that makes for a sweet last-minute gift or an unexpected addition to your cookie tray.

Keep in mind, though, that since you're working with molten sugar, this isn't something to try with kiddos. It's more of an after-bedtime project, I would say.

You'll need:
A candy thermometer
2 cups of sugar
2 cups of light corn syrup
2 sticks of salted butter (half a pound)
A dash of salt
A 14-ounce can of sweetened condensed milk
A bowl of ice water - keep this nearby while you're cooking
A cookie sheet lined with parchment paper
Wax paper, cut into small squares (4 inches or so works nicely)

Step 1: Combine sugar, corn syrup, butter and salt in a heavy saucepan and bring to a boil. Boil for 5 minutes, stirring constantly with a wooden spoon.

Step 2: Add the sweetened condensed milk.

Step 3: Continue stirring and stop cooking just before the temperature reaches 240 degrees. (For most of the time you're cooking it, the mixture will have a buttery color. Not until the temperature gets closer to 240 degrees will it darken, so don't worry). Using your spoon, drizzle some caramel into the ice water to cool it. Then, have a taste.

Step 4: If you're happy with the flavor and texture, carefully pour the caramel into your prepared cookie sheet.

Step 5: Let the candy cool, then cut into small chunks. No need to be super precise - it's homemade! Roll each piece inside a wax paper square and twist the ends closed. (I also tried using foil candy wrappers, purchased from a craft store. But I thought the wax paper was much easier to work with and prettier too).

homemade caramels

This recipe will give you many, many dozens of caramels. We're sharing with co-workers and neighbors ... and I'm very tempted to set some aside for caramel corn.

July 16, 2012

Aguas Frescas de Piña Colada


We recently came home from a week away to find our air conditioner broken. Kind of frustrating. I am trying to remind myself that for most of our lives together - up until the past three years, in fact - we lived in places that didn't have air-conditioning at all, and we survived just fine, even during the summer.

Things should be repaired soon, and in the meantime, I decided to take the heat as an opportunity to enjoy some aguas frescas.

Aguas frescas (translated literally, it's "fresh waters") are Latin American drinks that are non-carbonated, non-alcoholic and served cold, often ladled into cups from a big glass jar. My favorite is  piña colada, but it's typically not the easiest to find (Flavors like horchata and jamaica are far more readily available at taquerías and markets). Fortunately, I have a really easy make-at-home version that does the trick.


You'll need: A 20-ounce can of pineapple chunks in juice; a can of coconut milk (13 to 15 ounces, whatever your grocery store sells in that range); 2 cups water; and 2 tablespoons sugar

Step 1: In a blender, combine pineapple chunks (including juice), coconut milk and water. Blend until the pineapple pieces are very fine

Step 2: Stir in sugar

Step 3: Pour over ice
Told you it was easy.

July 12, 2012

Food in the Front Yard Project: Growing Cherry Tomatoes


When we said "cherry tomatoes," poor Alice heard only the "cherry" part. She popped one into her mouth, bit down, then looked up at me in betrayed confusion.

And even now that she knows they are not what she thinks they are, the little tomatoes are often too red and too round for her to resist.


In my rookie opinion, cherry tomatoes are super easy to grow in containers. We started out with three nursery-grown seedlings (probably more than a small family really needs) that we caged soon after planting. They like lots of full sunlight and consistently moist soil, and when they are ready to be harvested, they can be twisted off the vine with very little resistance.

Ours have been ripening in phases so that a single bush might have green, yellow, orange and red tomatoes hanging from it - it's very beautiful. One of the challenges of gardening with a toddler, though, is overzealous veggie picking. You can say, "Just the red ones, just the red ones," but sometimes she just can't help herself.


I've never been an enormous fan of tomatoes, but I'll admit it's been nice, in the evenings, to go outside and pick a bowlful of these guys to add to our salads and pastas.

Once, we made little caprese bites, wrapping a cherry tomato and a chunk of mozzarella inside a basil leaf, then skewering it all on a wooden toothpick. Super summery.


We replaced part of our front yard with an edible garden. To read more about it, start with Part 1, Part 2, and Part 3.

July 5, 2012

Growing Apricots


The other day, when we were out picking fruit, I asked my husband if he could remember whether we knew, when we bought our house, that the tree in the backyard was an apricot tree, or whether we were surprised to see it blossom that first spring.

(It was winter when we moved in, and the limbs were bare. I don't think we would have known by looking what the tree would become a few months later.)


My husband figures we didn't know it was an apricot tree at first - but that neighbors told us before it blossomed. Now that I think about it, that sounds about right. 


When I was growing up, my grandmother had an apricot tree in her backyard and - always - a stash of apricot jam in her kitchen cupboard. To know how to make jam seemed to me like the height of domestic accomplishment - something I would never do on my own.

But then we had this tree in the backyard, and we had to learn. Even after giving apricots away by the bagful, there was a mountain of fruit left over. Jam seemed like the only option.

It was easier than I thought.


Still, making a batch of jam out of backyard apricots always leaves me feeling like a deeply capable person. 


I sort of love that we inherited from our home this summertime tradition, that it requires the attention of all of us together.

The summer after Alice was born, we brought her outside to nap in the shade under the tree while her dad and I harvested. Now she pulls a chair under the lowest branches and reaches into the leaves to pick apricots herself.

And I hope that, after a while, it'll begin to show her what value there is in making something. Anything. A sonnet or a circuit board. How the process of making something new is a stay against boredom and anxiety and so many other things that have us running into ourselves.


Don't laugh, but entering a jar of jam at the County Fair is quickly rising to the top of my must-do list.

June 19, 2012

The End of the Cherry Season


In May, when the cherries ripen north and east of Stockton, workers arrive in vans and pickup trucks, pitch tents within the orchards, and live under the trees until the harvest is over just a few frenzied weeks later.

I never really cared for cherries before we moved here.

Now cherries – and the people who grow and pick them – are tied inextricably to my idea of spring.

“It’s May,” I think at the start of the season. “I wonder if they’re here yet.”


I met the Bravo and Gutierrez families about four years ago. They come from Atecucario, a very small village in Michoacan, Mexico. They leave their homes in February and travel to Ventura to pick strawberries. From there, they move up to Stockton, then on to the Pacific Northwest.

During the harvest months, their village is mostly empty. “A lot of old women and babies,” Olga Bravo said when Alice and I stopped at the orchard for a visit. The work had slowed by then, and the families were preparing to leave for the year.

We talked in the shade as dinner cooked on camp stoves and over campfires dug between the trees.


Alice loves cherries. She would eat cherries for days if I didn’t cut her off.

“Do you like them with salt?” Olga asked me as we were saying goodbye. I wrinkled my nose. “It’s delicious,” she insisted.

“Get the cherries cold, almost frozen, then sprinkle them with a little salt, a little chili, a little lemon juice. Try it.”

Maybe next year. This time, we tried cherry scones instead.


June 4, 2012

Food in the Front Yard Project: Blueberries (Plus a recipe for blueberry paletas!)


We're moving into a time of year when blueberries seem to be everywhere: floating on top of your breakfast cereal, scattered in your salad, whirling in your smoothie.

Not until a couple of years ago, though, did I even consider them a California crop - San Joaquin County alone produced 6,400 tons of them (worth close to $24 million) in 2010. Although blueberries traditionally needed a hearty winter chill to thrive, new varieties have been developed to suit warmer regions, including ours.

Blueberries were our gateway to front yard fruit and vegetable gardening. They're definitely pretty enough, with delicate white blossoms. In the fall, their leaves turn gold and bronze, and if you want, shrubs can be trimmed just like hedges.


The local cooperative extension has good resources on growing blueberries at home. My best advice is to fertilize. Blueberries, like azaleas and rhododendrons, prefer acidic soil. Last year we didn't treat the soil. This year we did - and the difference is remarkable.

(If you're not quite ready to grow your own, may I suggest a visit to Giusto Blueberry Farms in Acampo?)


It's so much fun to eat blueberries straight off the bush, and that's mostly what we do. But since the weather has taken a turn for the warmer, I decided to try some blueberry paletas.

Paletas are Mexican ice pops, usually made of fruit. For a real one, go to a big public park some afternoon and listen for the tling-tlinging of a pushcart bell. In the meantime, I thought these came out well.

You'll need:
2 cups blueberries
1 cups yogurt (I used peach-flavored. If you're going with plain, you might consider also stirring in some sugar or another sweetener).
ice pop molds


Step 1. Rinse and drain your blueberries, then puree them. If you want a smoother bar, you could push the puree through a strainer, but I preferred some texture - I even tried to leave some blueberries whole.

Step 2: Stir in yogurt

Step 3: Pour mixture into molds and freeze for 3 or 4 hours, or overnight. (If you have any leftover puree, you can make a single-serving smoothie while you're waiting for the pops to freeze).


That's it!

To read more about how we planned and planted our front yard garden, start with Part 1, Part 2, and Part 3.


May 24, 2012

Food in the Front Yard Project: Sugar Snap Peas


(First off. What fun to share our garden in The Record newspaper!

Not only did the piece let me do a little showing and telling about a project our family has really enjoyed, but it also gave an opportunity to draw on the knowledge of some super-insightful garden experts: Ivette Soler, the  designer behind The Germinatrix blog and author of "The Edible Front Yard: The Mow-Less, Grow-More Plan for a Beautiful, Bountiful Garden"; Eric Firpo, who buys and distributes locally grown produce through Stockton Harvest, and who manages both the new Woodbridge Farmer's Market and the Boggs Tract Community Farm; and Jeff Nelson, owner of Port Stockton Nursery, where we've bought many of our veggies and where - here's a fun fact - we took Alice on one of her first-ever public outings. We had her bundled in a Baby Bjorn. So sweet!


There were a few things that all three sources emphasized: 1. If you're new to edible gardening, try starting with herbs. 2. It's not too late - you still have time to put some summer plants in the ground, and 3. It's not too hard. I hope you'll check the story out!)


There's a certain briny smell, my dad has told me, that takes him by the shoulders and leads him back to the memory of a deli he used to visit with his dad - one where they sold pickles out of a barrel.

I guess I'm describing nostalgia here.


For me, anyway, the bright green crunch of sugar snap peas is a strong tug back to summery childhood. I look for them when I'm feeling a little homesick, even.

Nonetheless, I forgot to add sugar snap peas to my wishlist for our new front yard garden.
Thank goodness my husband remembered.


They're really easy to grow - and they grow quickly. Make sure you have a trellis or some other support structure. A few years ago, we grew snap peas in the back yard, but didn't properly trellis them. The plants collapsed on themselves. Such a heartbreaker.


You can eat sugar snap peas pod and all, but Alice prefers to pop open the pod and dig the peas out. I totally get that.


(P.S. We love sugar snap peas right off the vine, but for an easy chicken and snap pea stir fry recipe, check out The Record).


To read more about how we planned and planted our front yard garden, start with Part 1, Part 2, and Part 3.
Related Posts Plugin for WordPress, Blogger...